Choosing custom window drapery treatments is not simply a matter of matching fabric to wall color. It is a practical design decision involving light, privacy, insulation, proportion, and daily comfort. A beautiful fabric can still disappoint if the lining blocks needed daylight or the hardware cannot support its weight.
Interior designer Kelly Wearstler has said, “The details are not the details. They make the design.” Her observation applies directly to drapery selection. The return depth, pleat style, rod finish, and installation height can change how a room feels. A ceiling-mounted track may make a compact room appear taller, while full-width panels can visually enlarge a narrow window. Small decisions matter.
Measure twice.
Before ordering, observe the room at different hours. Notice harsh morning glare on the floor, fading near a sofa, or cold air around the glass. Consider whether the panels should stack beside the window or overlap it. Think about cleaning, child safety, furniture placement, and opening frequency. These details are easy to overlook.
There is no perfect treatment for every room. A heavy velvet may create warmth but feel excessive in a bright coastal interior. Linen may look relaxed but wrinkle more than expected. That trade-off deserves honest consideration. Working with a qualified drapery professional can reduce measuring errors and clarify fabric performance. The best custom window drapery treatments should look refined, operate smoothly, and support how the room is genuinely used. Style matters, but lived experience matters more.
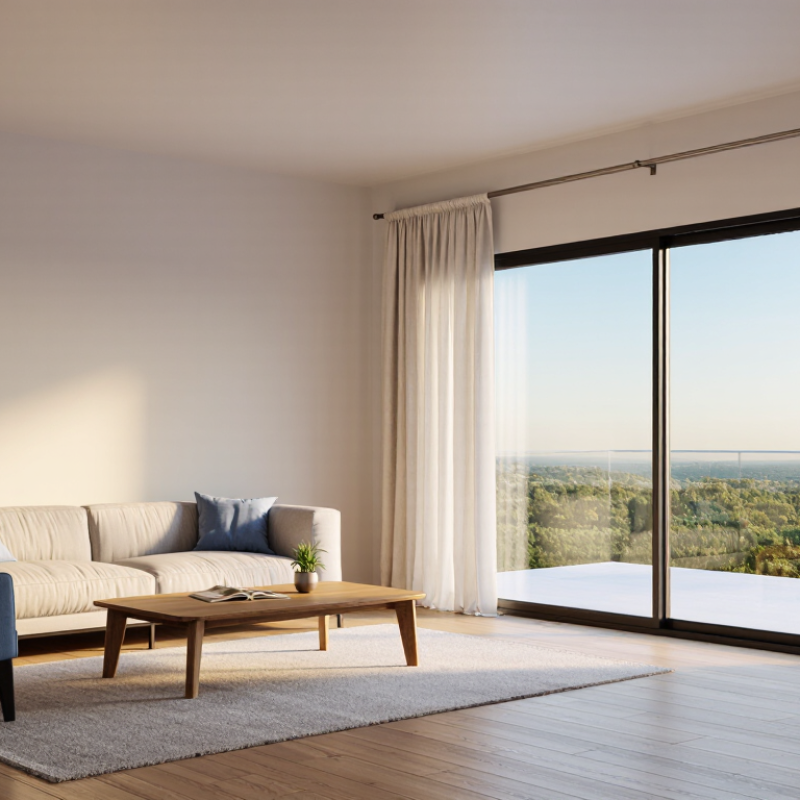
Choosing custom window drapery begins with the room’s actual job. A bedroom may need darkness, privacy, and softer morning light. A south-facing office may need glare control without losing daylight. Kitchens require washable materials, while living rooms often benefit from layered insulation. Measure the window, wall, ceiling height, and nearby furniture before selecting fabric. Small errors can create awkward gaps or blocked vents.
Orientation deserves close attention. South- and west-facing windows usually receive stronger solar heat, especially during summer afternoons. North-facing windows may feel cooler and need more thermal support. Windows can contribute roughly 30% of a home’s heat loss, so decorative curtains alone may not solve comfort problems.
Interlined drapery, cellular shades, and close-fitting side returns can reduce drafts and radiant heat exchange. Yet performance depends on installation quality. A beautiful treatment with exposed edges may leak air around the glass.
I recommend comparing fabric weight, lining, pleat style, and operating method together. Manual panels may suit occasional use, while frequently adjusted windows need an easier system. Check the hem position and watch how sunlight changes across the room. Color samples can mislead under evening lamps. I have seen a seemingly perfect fabric appear harsh beside pale flooring. That mistake is easy to make. Reconsider the window’s weak points, not only its appearance. A practical treatment should feel comfortable, remain usable, and support the room’s daily function.
Custom window drapery begins with disciplined measuring, not fabric selection. Record the glass, frame, and finished-floor lines separately. Measure width at the top, middle, and bottom; walls rarely behave perfectly. Use the smallest width for inside mounting, or the widest practical width for outside mounting. Then add overlap for the center meeting point. Measure twice.
Height needs equal care. For a ceiling track, measure from the track position to the floor, then subtract the planned clearance. For a rod, measure from the rod’s top or ring position to the desired hem. A half-inch error can change a clean break into an awkward puddle. The U.S. Department of Energy’s Energy Saver guidance estimates that windows can represent 25–30% of residential heating and cooling energy use. Proper coverage therefore matters beyond appearance.
Stackback is the space fabric occupies when open. Estimate it before ordering. A useful planning range is 15–20% of the covered width per side, but hardware changes the result. For fullness, multiply the finished coverage width by 2 to 2.5. A 100-inch opening therefore needs 200–250 inches of fabric before hems and pattern matching. This creates controlled folds instead of thin, stretched panels. The ASHRAE Handbook emphasizes accurate fenestration dimensions when evaluating window performance, yet field conditions remain messy. I still check the sill, radiator, handles, and nearby furniture. One missed obstruction can ruin a beautiful calculation.
| Measurement or Design Factor | What to Measure or Decide | Practical Guidance | Calculation or Rule | Worked Example |
|---|---|---|---|---|
| Window or Opening Width | Measure the full width of the window opening or the area that the treatment must cover. | Take at least three width measurements: top, middle, and bottom. Use the smallest measurement for an inside mount. For an outside mount, include the intended overlap beyond the frame. | Finished width = measured coverage width | A 60 in window with 4 in of coverage beyond each side has a finished treatment width of 68 in. |
| Rod or Track Width | Measure from the outer end of the left return or finial to the outer end of the right return or finial. | For a functional treatment, the rod or track should normally extend beyond the glass so the panels can clear the opening when opened. | Rod width = window width + left extension + right extension | 60 in window + 4 in left extension + 4 in right extension = 68 in rod width. |
| Finished Drapery Width | Determine the total width of fabric required after fullness is applied. | Finished width refers to the total width of all panels when the drapery is fully closed. It is not the flat fabric cut width. | Finished fabric width = rod or track width × fullness ratio | 68 in rod width × 2.25 fullness = 153 in total finished fabric width. |
| Fabric Fullness | Choose how much fabric is gathered or pleated across the finished width. | Use approximately 2× fullness for a clean, tailored appearance and 2.25–2.5× for a richer, fuller appearance. The selected heading style and fabric thickness affect the final result. | Recommended range: 2.0×–2.5× | For a 68 in treatment: 2× = 136 in; 2.25× = 153 in; 2.5× = 170 in of total finished fabric width. |
| Number of Panels | Decide whether the treatment will use one panel, two panels, or multiple panels. | Two panels are commonly used for a center-opening treatment. Dividing the total finished width evenly creates balanced left and right panels. | Width per panel = total finished width ÷ number of panels | 153 in total finished width ÷ 2 panels = 76.5 in finished width per panel. |
| Stackback Width | Estimate the space occupied by the drapery when it is fully open and gathered at the sides. | Stackback depends on fabric weight, lining, pleat style, panel thickness, and hardware. Reserve approximately 15%–25% of the finished treatment width as a planning allowance, then confirm with the workroom or hardware specifications. | Estimated stackback = finished width × 0.15–0.25 | 68 in finished width × 15%–25% = approximately 10.2–17 in total stackback allowance. |
| Clear Glass Width | Check how much of the window will remain unobstructed when the panels are open. | To maximize daylight and view, position the stackback outside the glass whenever the wall and hardware allow. The actual clear opening depends on the panel width and return depth. | Clear opening = glass width − stackback overlapping the glass | If a 60 in glass area has 6 in of total stackback covering the glass, approximately 54 in remains visually clear. |
| Finished Height | Measure from the top of the installed hardware or the selected mounting point to the desired bottom edge. | For a floor-length look, measure to the floor and subtract about 0.5–1 in for a slight clearance. Measurements should be taken at the left, center, and right because floors and ceilings may not be perfectly level. | Finished length = mounting height − floor clearance | 96 in mounting height − 0.5 in clearance = 95.5 in finished drapery length. |
| Mounting Height | Measure from the ceiling, wall-mounted bracket position, or the top of the window frame to the floor or selected bottom point. | Mounting several inches above the window frame can create a taller visual proportion, provided there is sufficient wall space and the hardware can be securely installed. | Mounting height = top of hardware to reference floor point | Hardware installed 4 in above a 92 in window opening with a 96 in floor reference gives a 96 in mounting height. |
| Bottom Finish | Choose the desired relationship between the bottom hem and the floor. | Common options include a slight floor clearance for a crisp look, a light break with a small amount of fabric touching the floor, or a puddled finish with additional length. Puddling requires more maintenance and is less suitable for high-traffic areas. | Finished length = measured height ± selected floor allowance | For a 96 in measured height, a crisp floor finish may use 95.5–95 in; a light break may use approximately 96–97 in. |
| Top Heading and Return | Specify the heading style, finished return, and overlap needed for the selected hardware. | Heading style affects fullness, appearance, and stackback. A return is the distance from the face of the rod or track back toward the wall. A center overlap can reduce a visible light gap between closing panels. | Panel cut details = finished panel size + heading, hem, side-hem, return, and overlap allowances | A center-opening pair may include a small center overlap and equal returns on both outer sides, subject to the hardware design. |
| Fabric Width and Pattern Repeat | Confirm the usable fabric width and any vertical or horizontal pattern repeat. | Fabric width is not always the same as usable width after side hems. Pattern repeats may require additional yardage for matching and can change the number of fabric widths required. | Fabric widths required = total finished fabric width ÷ usable fabric width | 153 in required width ÷ 54 in usable fabric width = 2.83, so at least 3 fabric widths are needed before pattern and construction allowances. |
| Lining and Interlining | Choose whether the drapery will be unlined, lined, or interlined. | Lining can improve opacity, privacy, insulation, and the appearance of the face fabric. Added layers also increase weight and may increase stackback, so the rod, track, and mounting points should be rated for the completed treatment. | Hardware capacity ≥ total weight of finished treatment | A lined, full-width pair of panels will generally weigh more and require stronger brackets than an unlined treatment made from lightweight fabric. |
Choosing custom drapery starts with the window’s exposure, not its color. In a south-facing room, compare opacity with solar performance. Opacity describes visible light blocked; it does not equal insulation. The U.S. Department of Energy’s Energy Saver report states that windows can cause 25–30% of residential heating and cooling energy use. A tightly woven face fabric can soften glare, yet a dark, unlined panel may absorb heat and warm the room. It looks substantial. That can mislead.
Lining changes the result. Thermal lining can add an air pocket and reduce drafts, while blackout lining mainly controls light. R-value is useful, but drapery R-values are difficult to compare without identical test assemblies, gaps, and methods. The National Fenestration Rating Council evaluates glazing through U-factor and solar heat gain coefficient, not fabric appearance. If a specification claims 76% solar-heat gain reduction, ask what it was compared with. Was it bare glass, clear glass, or another curtain? Lawrence Berkeley National Laboratory research shows that SHGC changes with glass type, shade position, and sun angle. One number is never the whole room.
Tips: Request the test report, sample size, and mounting details. Extend panels beyond the frame and reduce side gaps. Use a light-colored outward-facing lining in hot climates. In colder rooms, prioritize sealed edges and nighttime closure. I would check surface temperature with an infrared thermometer before ordering several panels. It is not a perfect test. Still, it can reveal a beautiful but inefficient choice.
How to Choose Custom Window Drapery Treatments?
Hardware should match the fabric’s weight, window span, and daily operation. A sheer panel needs less support than lined velvet. Measure the finished fabric, lining, pleats, and any decorative trim. Then add a practical safety margin. I once specified a slim rod for a wide opening. It looked elegant, but the center sagged within months. That choice needed more honest testing.
Long spans usually need center supports or a track with engineered carriers. Choose brackets that anchor into studs, blocking, or suitable masonry hardware. Hollow drywall alone is not dependable for heavy treatments. For frequent opening, use smooth carriers and a wand or motorized control. The Window Covering Manufacturers Association’s A100.1-2022 standard highlights the importance of safer operating systems, especially around children and pets. Operation is not a small detail.
Durability also affects energy performance. The U.S. Department of Energy reports that window heat gain and loss account for about 25–30% of residential heating and cooling energy use. A well-fitted drapery can reduce drafts and unwanted solar gain, but it cannot correct poor installation. Check return edges, overlap, and floor clearance. The National Fenestration Rating Council emphasizes measured window performance, yet drapery hardware remains site-specific. This is where standard rules become imperfect. Heavy fabric, humid rooms, and repeated pulling can change the result. Test the actual assembly before final installation. Five trial cycles help. Fifty are better.
How to Choose Custom Window Drapery Treatments?
When choosing custom window drapery, child safety should guide every design decision. Loose cords can create avoidable hazards, especially near beds, sofas, and play areas. Ask the installer which current safety standards apply in your region. Request written details about cordless options, tension devices, cord stops, and mounting requirements. Do not accept vague assurances. A safer treatment is also easier to live with.
Installation quality affects both safety and appearance. Measure the window in several places, because walls and frames are rarely perfectly square. Confirm the bracket type, anchor method, and load capacity before drilling. After installation, test the track or rod repeatedly. It should move smoothly without scraping, sagging, or pulling from the wall. I once trusted a single width measurement, and the finished drapery looked slightly uneven. That mistake taught me to check the actual opening, not just the drawing.
Tips: Leave clearance from handles and heating vents. Check that hems hover evenly above the floor. Photograph hidden brackets before final payment. Keep care instructions and adjustment records. Ask for a correction if the fit feels wrong. “Close enough” can become a daily annoyance. Recheck safety devices after several weeks, because settling hardware may loosen. A careful inspection protects children, preserves the fabric, and confirms the treatment truly fits the room.
Use this checklist as a practical evaluation framework: verify that cords and loops are inaccessible or eliminated, confirm secure and level installation with appropriate fasteners, and check the finished width, height, clearance, and hem before approving the final fit.
The priorities shown are a transparent planning model rather than a brand comparison. Child-safety requirements should be checked against applicable regulations, including the U.S. CPSC window-covering safety rule, 16 CFR Part 1260.
Reference: U.S. Consumer Product Safety Commission, 16 CFR Part 1260.